Avalanche Safety–Get Educated and Mitigate Avalanche Risk in the Backcountry
We all dream of deep powder days and the endless adventure backcountry skiing provides. But it’s more complicated than just choosing a zone and hitting the skin track. Whether it’s signing up for an avalanche course, dialing in equipment, or analyzing the avalanche report with partners, creating a culture of ongoing education and thoughtful decision making is what will keep us safe in the backcountry.
There’s no single answer to avalanche safety—it requires patience, attention to detail, and a lifelong commitment to learning. Study, practice, communicate, and keep exploring; the more we learn, the safer the backcountry will be for everyone.
Get Avalanche Education
Getting educated is a key part of skiing in the backcountry, and the number one way skiers and riders can mitigate their avalanche risk. A two-day Avalanche Level 1 class and a single-day Avalanche Rescue Course are both great ways to kickstart your learning and build a solid foundation as you embark upon the journey of backcountry skiing.
Education goes beyond formal courses; time in the field is where the puzzle pieces start to fit together. Seek out mentors, ask questions, and find opportunities to put your skills into practice as you gradually start to feel more confident traveling through avalanche terrain.

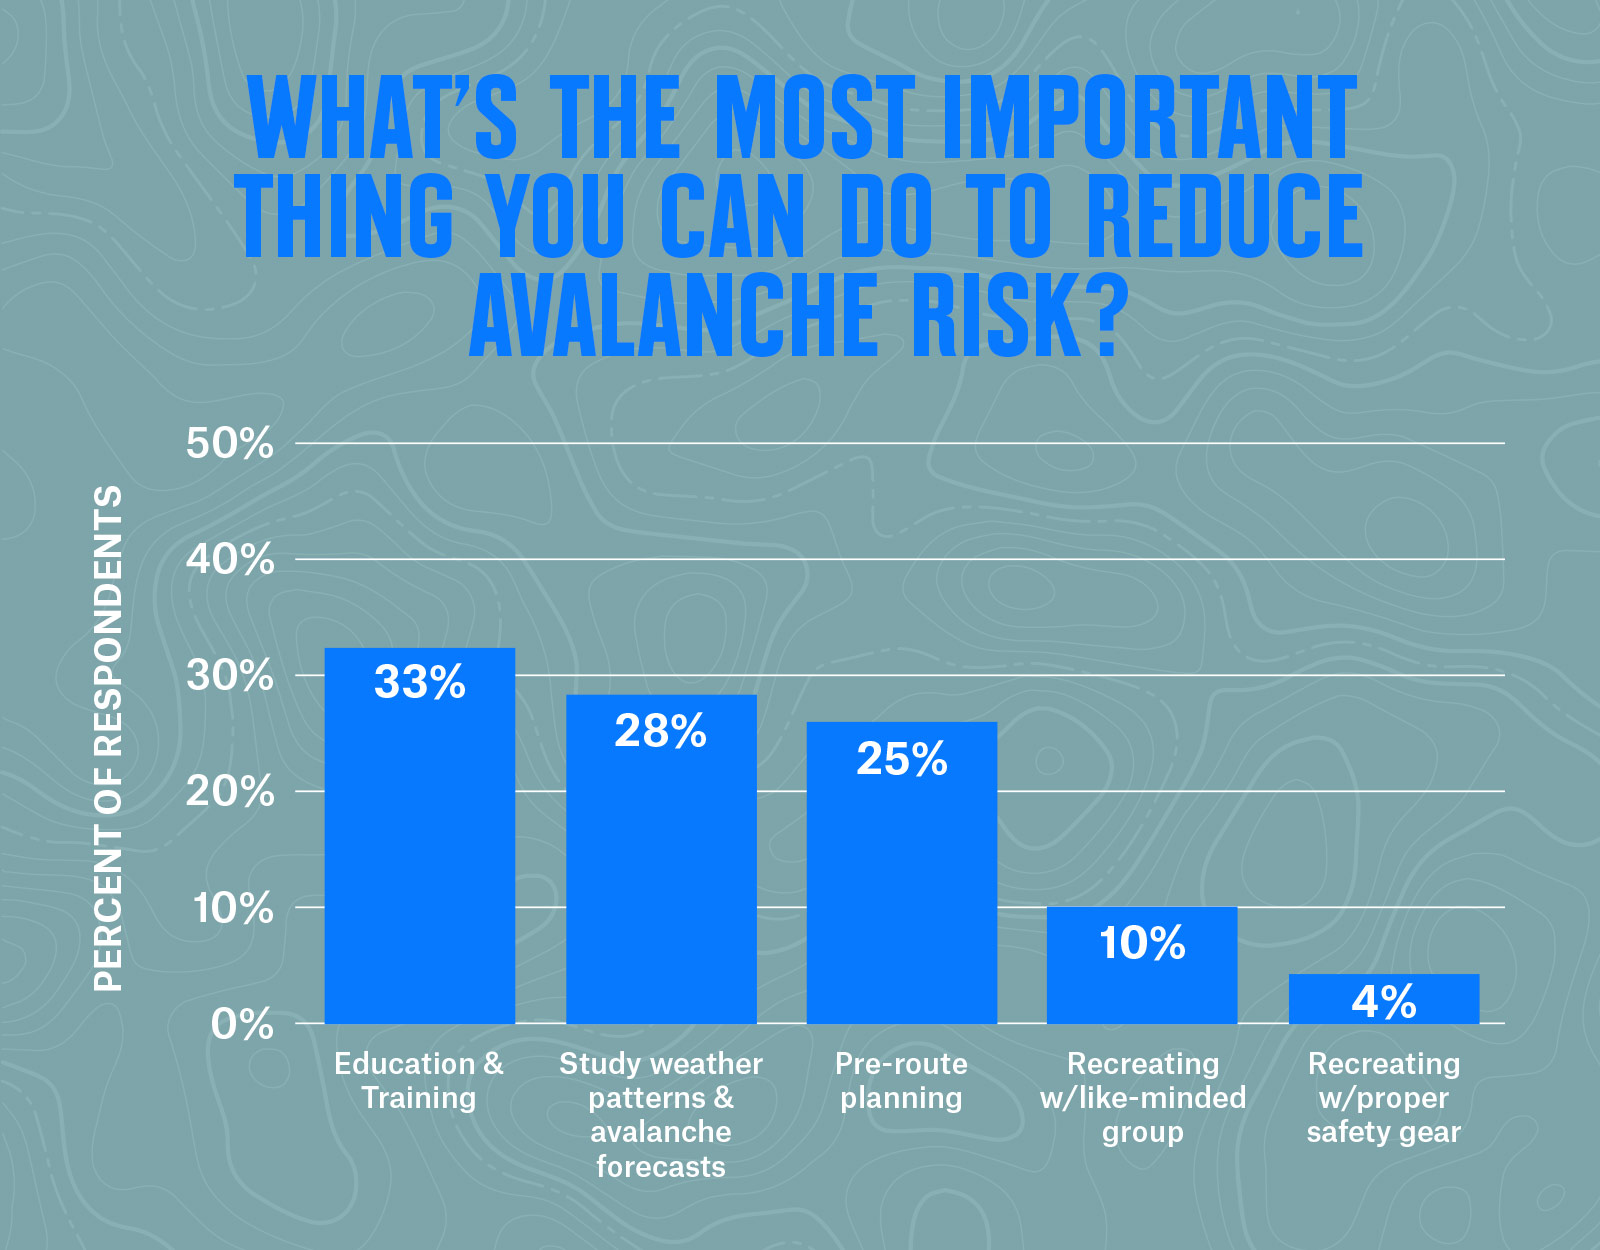
Thirty-three percent of the respondents to an onX Backcountry survey about avalanche education and safety said the most important thing you can do to reduce avalanche risk is to get education and training. See the full survey report for all of the data.
Read and Interpret the Avalanche Forecast
Before you head out, read the daily avalanche forecast for the zone you will be going into. If you’re unsure what zone you’re in, you can use the onX Backcountry App to search for the local avalanche bulletin and be sure you’re getting the most up-to-date information. There you’ll find an overall danger rating for the day, as well as a deep dive into current avalanche problems, and useful weather resources for trip planning. Reading the avalanche forecast and what kind of aspects and elevations each avalanche problem exists on will help you learn about safe terrain as well as zones to avoid.
If you’re traveling to a new area, start reading the avalanche report in the days and weeks before you arrive to get familiar with what’s going on in that zone. Checking out the observation and recent avalanche updates will help paint an overall picture of the conditions.
Minimize Avalanche Risk
Use the Avalanche Forecast to plan around current avalanche problems and decide what terrain you want to avoid. The onX Backcountry App has Layers and trip planning tools that will help you develop a concrete plan, so once you get out there you can hit the ground running.
E-scout for Backcountry Skiing
E-scout your line (and approach!) in onX Backcountry to determine what terrain you want to ski and what terrain you want to avoid. Take into account hazards from your approach or exit as well as your actual ski line.
Whether you’re going for a big objective or lapping your favorite powder stash, it’s a good idea to have a safer Plan B and C so it’s easy to pivot if conditions aren’t lining up, or if you encounter red flags.
Understand Slope Angle and Slope Aspect
Use onX Backcountry to look at slope angle and aspect for the area you want to ski. Using the Slope Angle Layer is a quick way to rule out avalanche-prone slopes, which can be harder to estimate while you’re skiing. If you’re trying to avoid avalanche terrain, stick to slopes 30° and below, and be sure to keep an eye out for what’s above and below you. Steep pitches of untouched powder tend to lure us in, so referring to the slope angle on your map will help you keep your exposure in check. If you’ve ruled out certain avalanche problems on a certain aspect—say west winds caused a wind slab on the leeward side of east facing slopes—a quick map check will help confirm that you’re on the right track and sticking to your plan.
Use a GPS or Mapping App
Use the onX Backcountry Avalanche Fatality feature to learn about historic deadly avalanches and in the area. Analyzing past avalanche events can teach us a lot about terrain, snowpack, and group dynamics, and help improve decision making in the future. Terrain with multiple fatal incidents can be especially helpful to understand as you plan a tour.
Practice Avalanche Terrain Management
Once you’re in the field, utilize techniques to gather observations and recognize red flags as you travel through the mountains. While we can anticipate conditions from the avalanche bulletin, getting into the field is where we find out what’s really going on. It’s impossible to capture the nuance of what’s going in an entire forecast zone in just one avalanche report, so terrain evaluation in the field is crucial.
Sometimes conditions change while we’re out, so look for visual cues like wind loading, collapsing and cracking, rapid warming, or other avalanches, and be ready to pivot to Plan B or C when the mountains start talking to us.
Carry Avalanche Safety Gear
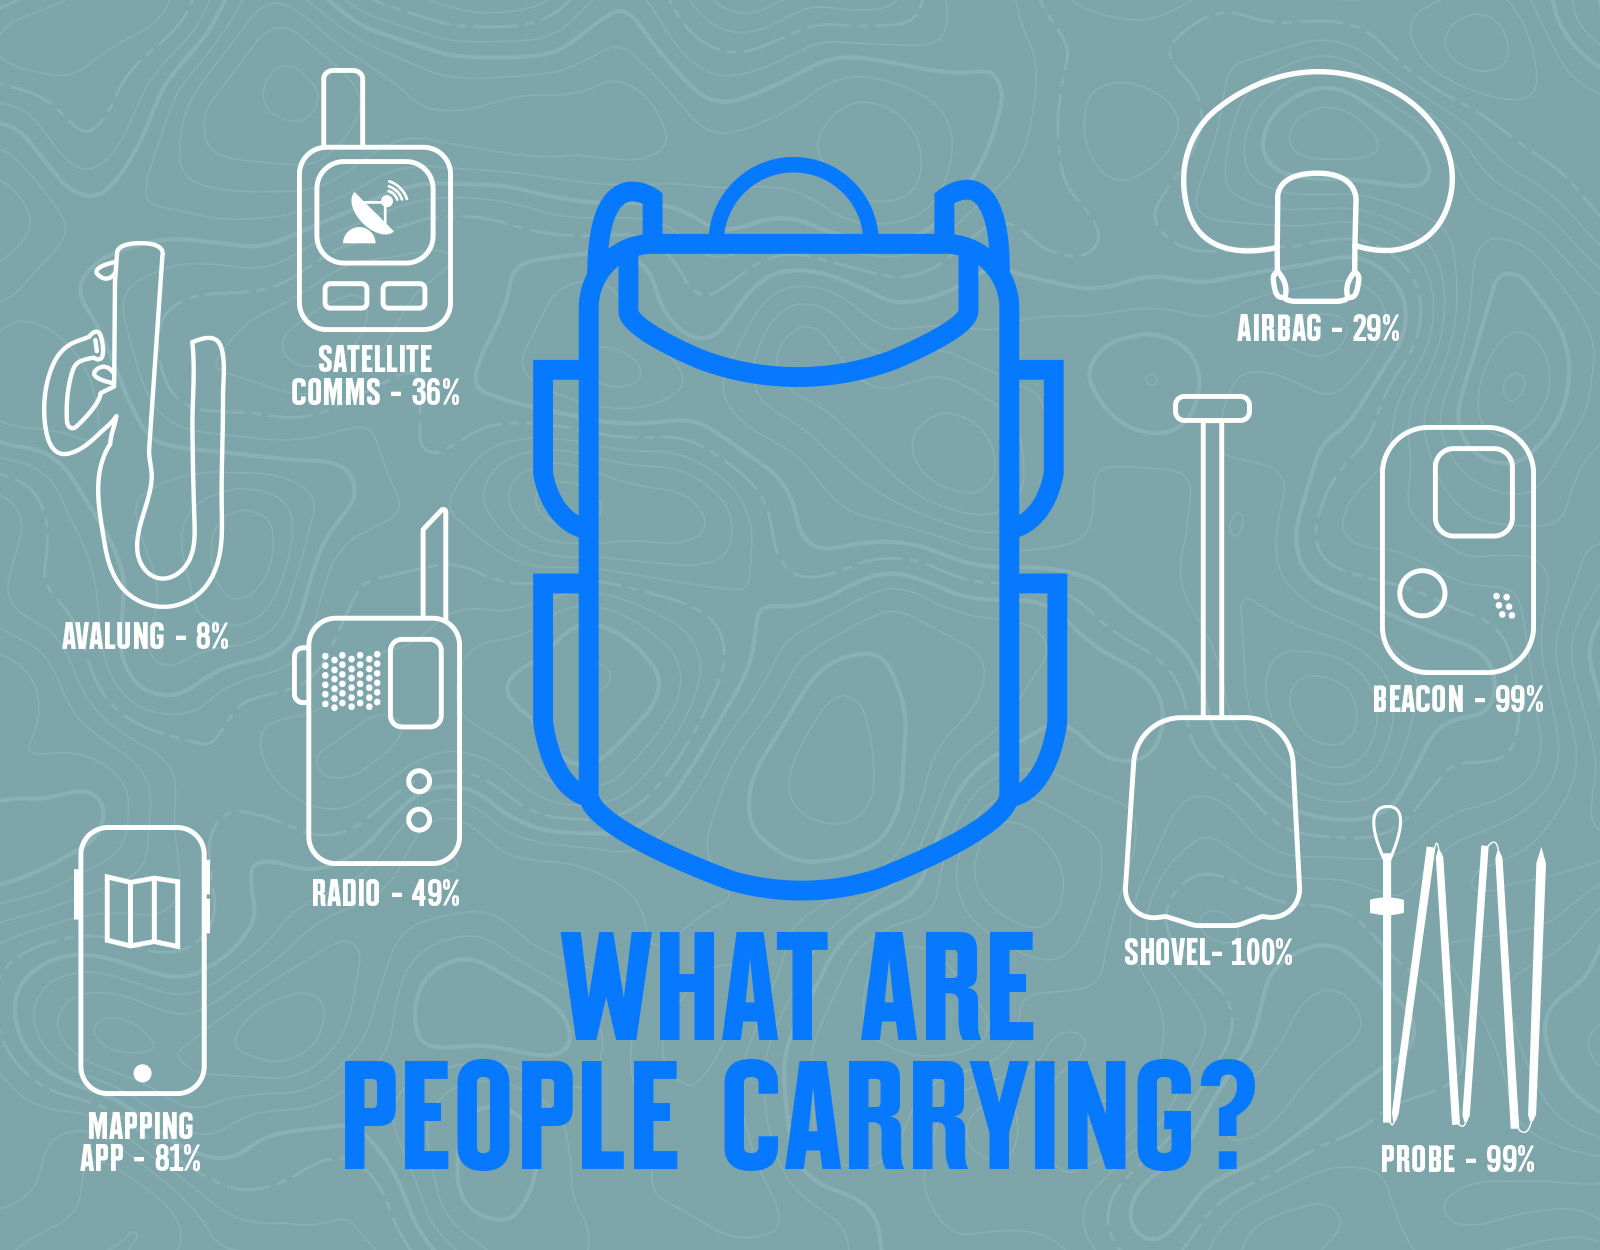
What’s in your pack? Be sure to carry all the essential avalanche safety gear—beacon, shovel, and probe—as well as everything you need to stay comfortable and dry in the wilderness. It’s a good idea to expect the unexpected, and a repair kit and first aid kit could become lifesaving if things start to turn south. Even if you only plan to be out for a few hours, carry enough emergency gear—like an additional down jacket, headlamp, and extra food—in case you have to spend an unplanned night out.

Avalanche safety can seem daunting. A lifetime of learning sounds, well, pretty long. But there’s beauty in the process (there’s nothing we love more than nerding out on maps over coffee in the morning), and hopefully lots of powder skiing along the way. Investing time and money in tools and education pays out in the long run to keep us out there for years to come.