Essential Gear for Backcountry Skiing
Whether it’s a dawn patrol lap, long weekend ski tour, beautiful summit, steep couloir, or a mellow pow lap, earning our turns is a favorite way to spend the winter. While ski touring can be the perfect way to escape into nature, seek untracked powder, avoid lift lines, and explore new zones, the backcountry also poses many risks and hazards to take seriously before heading into the mountains.
Stepping out of bounds requires preparation, diligence, and education. Choosing what to pack for a backcountry ski tour can feel daunting at first. If you’re a seasoned backcountry skier or are just getting into the sport, we’ve put together a comprehensive guide of all the gear you’ll need to be prepared for a backcountry ski tour.
Education, a Plan, and Trusted Partners
Before you even think about heading out of bounds, education is step one. While untouched lines and big summits are what fuel us, spending time to educate ourselves and prioritize safety is always our first priority.
If you’re new to the backcountry, it’s a great idea to take a Companion Rescue and Rec Level 1 course before heading out, as well as seeking out advice from experienced partners. Practice reading your local avalanche bulletin (which you can locate through your onX Backcountry App) and create a tour plan that takes into account the hazards of the day. And remember: if you don’t know, don’t go.

Avalanche Rescue Gear
No matter the danger rating or terrain choice, you should always carry a beacon, shovel, and probe when you head into the backcountry.
Beacon – Also known as a transceiver, beacons have a “send” and “receive”’ mode that transmits a signal throughout the day and can be switched to receive a signal to initiate a search. Most beacons made in the last few years have three antennas, which is an important feature for efficient pinpoint searches.
Probe – A probe is used to determine the exact location of the victim once you’ve finished the pinpoint search. Look for a probe that’s at least three meters. Two-meter probes are sold, but are less effective in deep snowpacks you’ll find later in the season.
Shovel – A shovel is the workhorse of the avalanche rescue, so make sure you’ve got a good one. Metal is a necessity (most are made from aluminum due to its high strength-to-weight ratio), and generally the bigger the blade the better, provided it fits in your avalanche safety pocket. Don’t be tempted to carry a plastic shovel to save weight—plastic is no match for cement-like avalanche debris.
Touring Setups for Ski Touring and Splitboarding
Skis – You can turn any ski into a ski touring ski with the right binding, but touring specific skis are much lighter than resort skis, which will save energy on the uphill. Within the category, there are still tons of options depending on whether you’re looking for an ultralight ski mountaineering ski for long walks, or a heavier powder ski that you’ll be using for shorter laps. If you’re looking for a one-quiver touring ski, look for an all-mountain ski in the 100mm waist range (give or take, depending on where you live).
Splitboards – Most backcountry snowboarders use a splitboard to ascend, a snowboard that splits down the middle so you can ascend on two planks, then reattaches at the top for the ride down. Like touring skis, splitboards are usually constructed with lighter materials and vary in length and width depending on the terrain you plan to ride. An all-mountain board is a great choice if you’re getting into the sport and want to have options.
Skins – When choosing skins, you’ll have the choice between mohair, nylon, or a mix. Mohair skins provide the most glide and generally pack up the smallest, while nylon is grippier, albeit slightly more bulky. If you’re less comfortable ascending, a skin with more nylon will feel more secure. Many skins come in a 65/35 mohair/nylon blend, a great middle ground for most.
Bindings – Most skiers these days opt for tech bindings, a minimalist binding with pin tech inserts in the toes, which allow the boot to move freely while climbing. Frame bindings, while heavier and bulkier, are popular with those looking for a crossover setup for the occasional out-of-bounds lap.
Boots – It’s important to tour in a boot with a walk mode setting, a feature that permits the cuff to rotate for range of motion while you skin or bootpack. If you’re using tech bindings, make sure your boot has pin inserts at the toes. If you’re using a frame binding, a more traditional alpine boot will work.
Poles – While you can use your resort poles, touring poles are often collapsible, so you can adjust the height while you’re climbing and descending.

What To Wear Backcountry Skiing
Layering is an art in the backcountry, and staying warm and dry often feels like an uphill battle. Throughout the ski tour, you’ll likely be taking off layers and putting them back on, so keep that in mind and pair pieces that fit well together.
Merino Wool Baselayers – Merino wool is breathable and moisture-wicking, the best choice for your next-to-skin layer. Synthetics work too, but avoid cotton layers at all costs.
Midlayer – On cold days, a midlayer is often your outer layer for the ascent. Choose something weather resistant and breathable, like a fleece or softshell jacket.
Insulated Jacket – For cold descents and lunch breaks, break out a puffy jacket to stay warm when you stop climbing.
Shell Jacket and Pants – Waterproof outerwear is crucial for midwinter touring, even if it’s not actively snowing. Whether or not you wear it the whole time, keep a Gore-Tex jacket handy for the descent or a surprise storm. In the spring, softshells are a good substitute.
Gloves – Always bring at least two. It’s nice to have a lighter pair of breathable gloves for the uphill, and a warm, dry pair of gloves or mittens to throw on before your descent.
Hats/Balaclavas – Depending on the weather, a brimmed hat is a popular choice for climbing, with a beanie on reserve to wear under your helmet for the descent.
Helmet – Even if you’re skiing mellow pow laps, a helmet is an essential part of your backcountry setup. Snow in the backcountry is unpredictable and in the event of an avalanche, a helmet could save your life.
Emergency Layer – It’s a good idea to always carry one extra layer you don’t plan to use, in the event you get stuck outside for longer than you expect.
Backcountry Packs
Backcountry packs have important features designed with ski touring in mind, such as a dedicated avalanche safety pocket, helmet carry, and ski or snowboard carry. They’re also often constructed with a burlier material than a summer hiking pack, which comes in handy around ski edges. For a day pack, 25 to 35 liters is a good range to look for. Anything above 40 liters might feel cumbersome on a day tour, but would be a great option for a hut trip.
Many skiers and riders opt to carry airbag packs as an extra precaution in the event of an avalanche. Airbag packs, which inflate to bring the skier to the surface of the debris, have proven effective in some cases when used correctly.
Skintrack Fuel
Fueling throughout the day is an important part of any ski tour. Everyone is different, but bring a variety of snacks and drinks that are easy to access, packable, and filling.
Food – A good rule of thumb to aim for is about 150 calories per hour. Granola bars, sandwiches, energy balls, gummies, and burritos are all easy things to stash in a pack. Keep a few things in accessible pockets for fueling between breaks.
Water – Aim to carry 1.5 to 2 liters of water for a day tour. It can be hard to guzzle cold water when it’s snowing, so consider supplementing with a thermos of hot tea or broth. Adding some electrolytes to your water can also help keep you going on a long day.

Emergency Gear and Communication
Repair Kit – Generally, one or two per group is ideal. Ski straps, an extra pole basket, duct tape, skin wax, zip ties, multitool, and a snow scraper can all help you get out of a tricky situation. Make sure you’ve got a multitool that works with your bindings.
Headlamp – You might not plan to get caught in the dark, but if you do, a headlamp is essential.
Keep a battery-powered headlamp in your pack at all times and a few spare batteries. It’s a good idea to flip one battery around to face the wrong way so you don’t accidentally turn it on while skiing and kill the battery.
First Aid Kit – For a small group, one first aid kit per party is a good rule of thumb.
Bivy Sack or Rescue Tarp – A weatherproof cover for your sleeping bag, a bivouac (bivy) sack is a small but effective line of defense if you get stuck out overnight. A rescue tarp is slightly bulkier, but can be used both as a shelter and a way to haul an injured skier out.
Satellite phone – If you’re in a remote area with no service or on an overnight trip, it’s a good idea to have a satellite phone on hand for emergency calls.

Backcountry Navigation Equipment
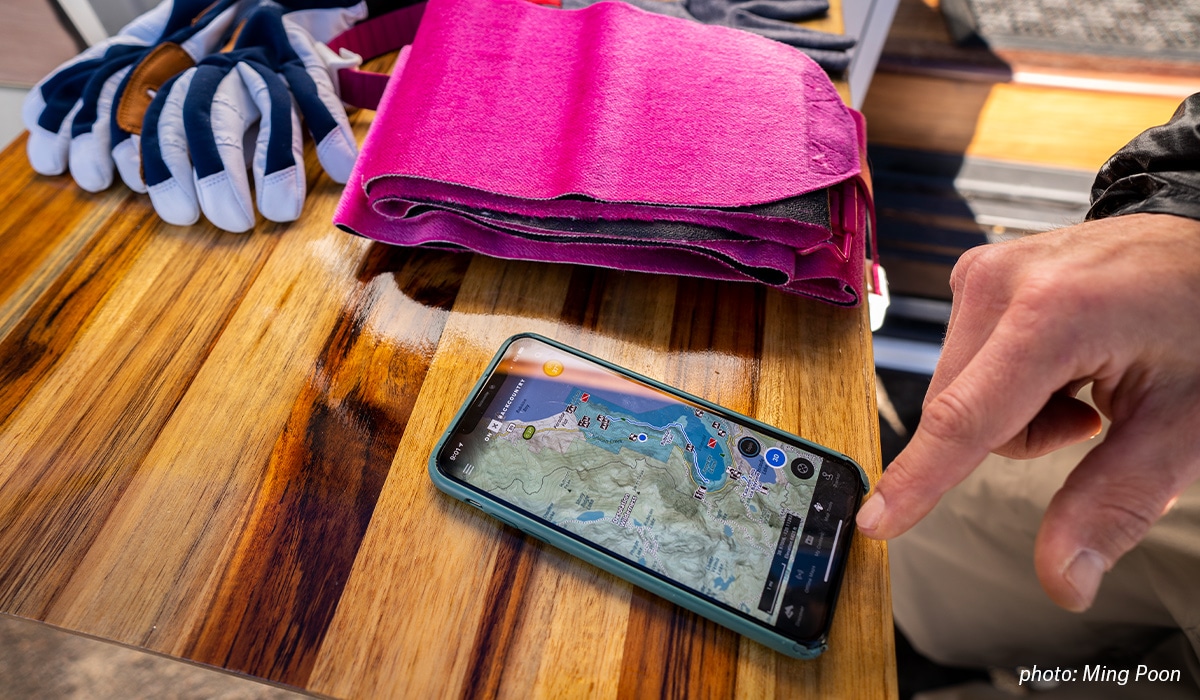
onX Backcountry App – Whether you’re exploring a brand new zone or skiing on your home turf, the onX Backcountry App is a helpful tool for putting together a tour plan and navigating in the field. Create a tour plan before you head out, download your map for offline use, and reference the app in the field to make sure you’re on route.