How to Plan a Backcountry Hut Ski Trip
Ski-in ski-out backcountry skiing? Yes, please. Not much compares to waking up in a toasty yurt next to a wood stove and sipping pre-dawn coffee in the middle of the wilderness. Hut trips are a great way to fully immerse yourself in the world of backcountry skiing because they allows you to spend a few nights off the grid with your friends and explore new zones that are out of reach on a day tour.
There are tons of huts and yurts all over the country, including Colorado, Idaho, Montana, Wyoming, Oregon, and Washington, so choose a zone and get planning!

Safety First
Before you head into the backcountry, be sure you have the proper training, gear, and understanding of the conditions and terrain you plan to enter. Always head into the backcountry with experienced partners you trust.
Planning Your Hut Trip
Unless you get a last-minute invite or score a cancellation, organizing a hut or yurt trip takes some planning in advance. Some hut systems have a scheduled date that reservations open, while others operate on a lottery basis. Mark your calendar with the date that you can start applying for the respective zones you’re looking to ski. For instance, Colorado’s Tenth Mountain Division Huts open up their lottery each February for the following winter, while the yurts managed by Sun Valley Trekking operate on a rolling reservation basis.
You’ll almost always have to book the entire hut. Capacity usually ranges from 6-16 people, so coordinate with your touring partners when booking the hut to make sure you’ve got friends to fill it and help with the cost.
Plan Your Route with onX Backcountry
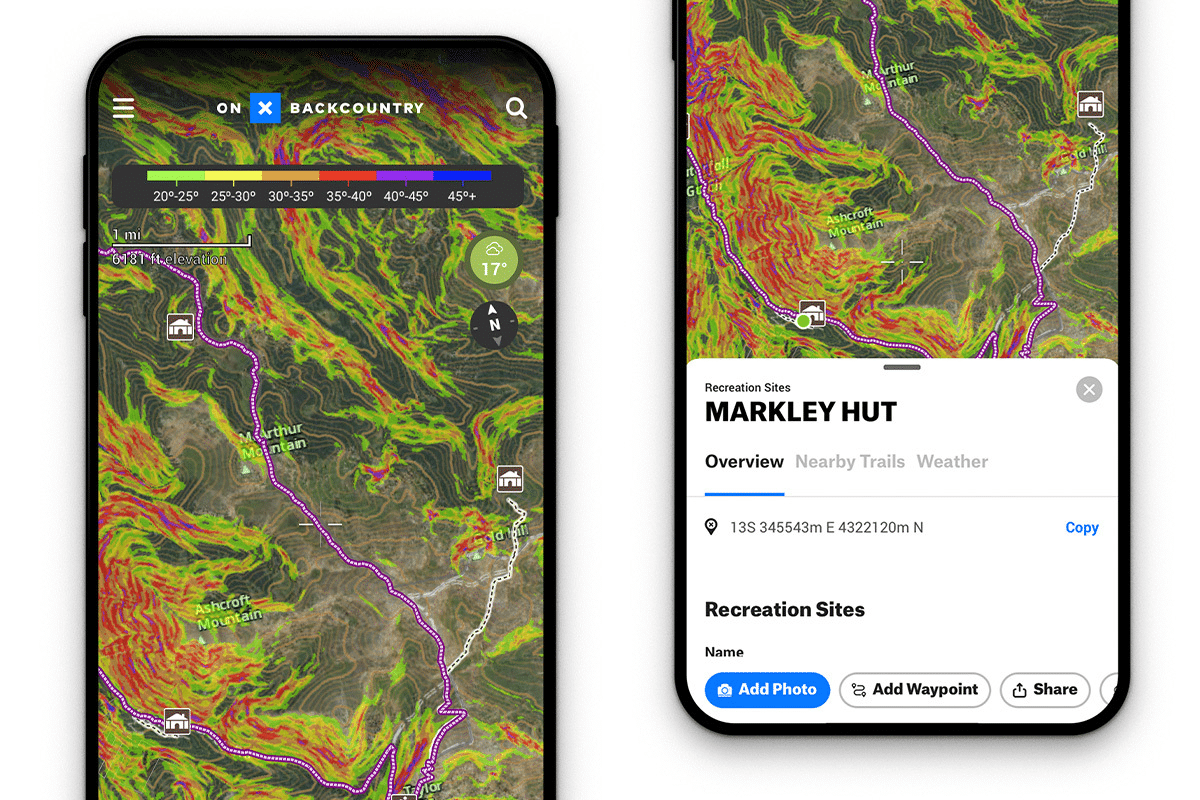
With your hut confirmation in-hand, it’s time to start planning your route with onX Backcountry. Use the search bar to easily find the hut you’ve reserved to start your e-scouting. Investigate the route to your destination, evaluate slope angle, mark avalanche zones with Waypoints, and denote other considerations for your journey. Calculate your anticipated mileage, elevation profile, and estimate the time it will take you to arrive. These are all great elements of a safety plan. Download a map of your area for offline use and track your progress while on route.

Pack Your Gear
Along with the standard backcountry ski essentials, you’ll need to pack in some extra hut supplies for your stay. A sleeping bag, extra food, pillow, hut slippers, toiletries, and a change of clothes usually require a larger 50 to 70-liter touring pack. If you’ve got a very flat approach that’s mostly on a snowmobile road, some opt to tow a sled, but think twice before towing a sled through steep, undulating terrain. Most huts have mattresses already, but confirm before you head out.
Extra hut gear:
- Sleeping bag: a 20-degree bag is almost always sufficient.
- Hut slippers: Down booties or Crocs are great to wear around when you peel your boots off.
- Extra hut clothes: A t-shirt, sweatpants, or extra set of baselayers that you can wear as pajamas, or use the following day so you don’t have to wear your sweaty layers after skiing. A dry pair of socks goes a long way!
- Toiletries: toothbrush, toothpaste, and any medications you need.
- Extra batteries or chargers: a power box or charger to keep your phone juiced up so you can navigate with the onX Backcountry app.
Coordinating food takes some logistical planning, and everyone does it a little differently. Assigning a few people one communal breakfast or dinner to be in charge of is a great way to divvy up responsibilities. Instead of carrying in your own food for four days, you only have to plan on feeding everyone dinner one night. Since you’ll be out skiing most of the day, it’s often easiest to suggest everyone do their own thing for lunch.
You can rely on a kitchen with a stove and appliances, but look into the specific hut you’re staying at for a full list of amenities before you plan your meals. Huts are often locked so a passersby doesn’t wander in, so be sure you have the check-in instructions (usually a key code) as a note in a Waypoint or written down before you leave the trailhead.

Checking Out
On your last morning, be sure to leave yourself adequate time to follow your hut’s cleaning procedures. With a big group, you can usually get everything done in an hour or so, depending on the hut-specific requirements. Many huts ask guests to chop wood, sweep the floors, and scrub the communal kitchen supplies. Essentially, you want to leave the hut exactly as you found it.
While you can burn some food scraps, be prepared to carry out your trash as well. It’s a good idea to stash a few trash bags in your pack for carrying out trash at the end of the trip, especially when you’re stuffing it in your bag right alongside your sleeping bag and clothing.
With proper planning, spending a few nights at a backcountry hut can be the highlight of the season. Organizing your first hut trip can sometimes feel overwhelming, but it gets smoother each time. Soon enough, you’ll be scouring hut system websites to score as many reservations as you can get your hands on and using onX Backcountry to plan your routes.