While the onX Hunt App saves all your map markups, such as Waypoints, Lines, Area Shapes, and Tracks, on its servers, you may be interested in backing up onX GPX exports on your own devices. Or, you may be interested in importing a GPX or KML you created using another tool.
Read on for tips on using the import and export features in the onX Hunt App and Web Map.
Why Import and Export onX GPX Files?
- Coordination Across Systems: GPX is a widely used format for GPS data, which means map markups exported from onX Hunt can be used across various GPS devices and other mapping software, which can be helpful if you have hunting partners who use different systems.
- Data Backup: There’s no need to back up your onX Hunt App data (we do that for you), but some people gain additional peace of mind from having a copy of their hunting data in multiple locations. Your data is yours, so you’re free to export it and use it how you wish.
- Optimize App Performance: Each map markup uses a small amount of working memory on your device. By exporting your content to your computer and temporarily removing it from your account, you’ll free up working memory, allowing the App to run more efficiently. That said, the App can handle a tremendous amount of data, so most people will never need to think about this.
- Improve Organization: Avid onX Hunt users may find themselves with thousands of map markups. Certain markups only apply to specific situations or seasons, so you may want to offload some map data to clear up your “My Content” area.
onX team member Jared Larsen is a fan of this approach. After every trip, he selects the Waypoints and Tracks from those dates and saves them as a GPX file. He then deletes the markups from his onX account.
“It’s great to have all that information for future reference,” says Jared, “but I’m not going to need it again until I start planning my next hunt in that area. Better to clear it out and keep it from cluttering up my map.”
Tip: Don’t want to export your data but still want to stay organized? Organize your markups in folders. Then, you can hide markups you don’t want to see on your map in just a few taps: Select “My Content,” tap the folder containing the markups you won’t need for a while, and turn on “hide folder on map.”
How To Export GPX Files from the Hunt App
The Hunt App only exports GPX files, so if you need to export a KML, please use the Web Map.
To export GPX files on your mobile device, follow these steps:
- Tap “My Content” from the navigation menu at the bottom of your screen.
- Tap the “Select” button.
- Select the markups you want to export. You can either tap the markups directly on the map or select the checkboxes within the “Select Content” box.
- Scroll right on the buttons at the bottom of the screen and tap “Export.”
- Save or share the file to the desired destination on your mobile device.
Additional Notes:
- Exporting single markups: You can export markups without tapping into “My Content” (but exporting from “My Content” allows you to bulk export markups). If you want to export a single markup, tap the markup on the map and scroll right on the buttons at the bottom of the screen until you see “Export.”
- Exporting folders: If you have your markups organized in folders, you can export entire folders by tapping “My Content,” selecting the folder(s) you want to export, and scrolling right on the buttons at the bottom of your screen until you see “Export.”

How To Export GPX or KML Files Using the Web Map
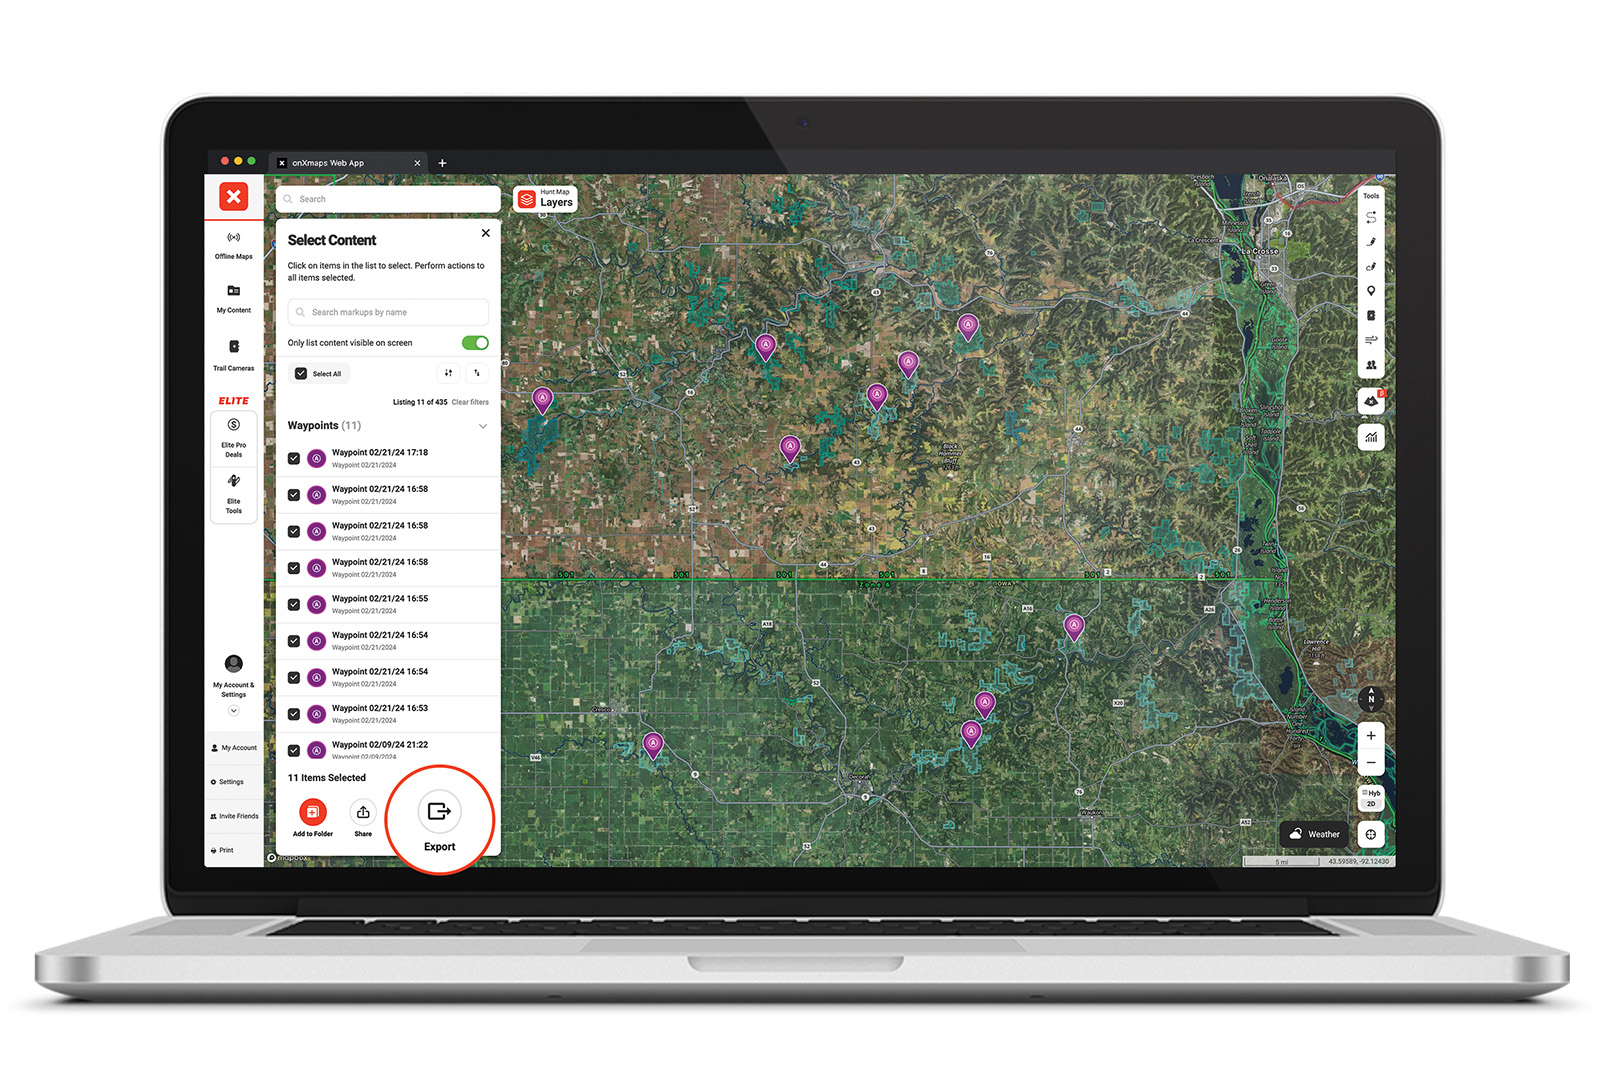
To export GPX or KML files on a computer, follow these steps:
- Select “My Content” from the left navigation menu.
- Click “Select.”
- Select the markups you want to export. If you’re exporting a lot of markups, you can speed things up by choosing “Select All.” Or, if you have your map positioned to show the relevant markups, turn on “Only list content visible on screen.”
- Click “Export.”
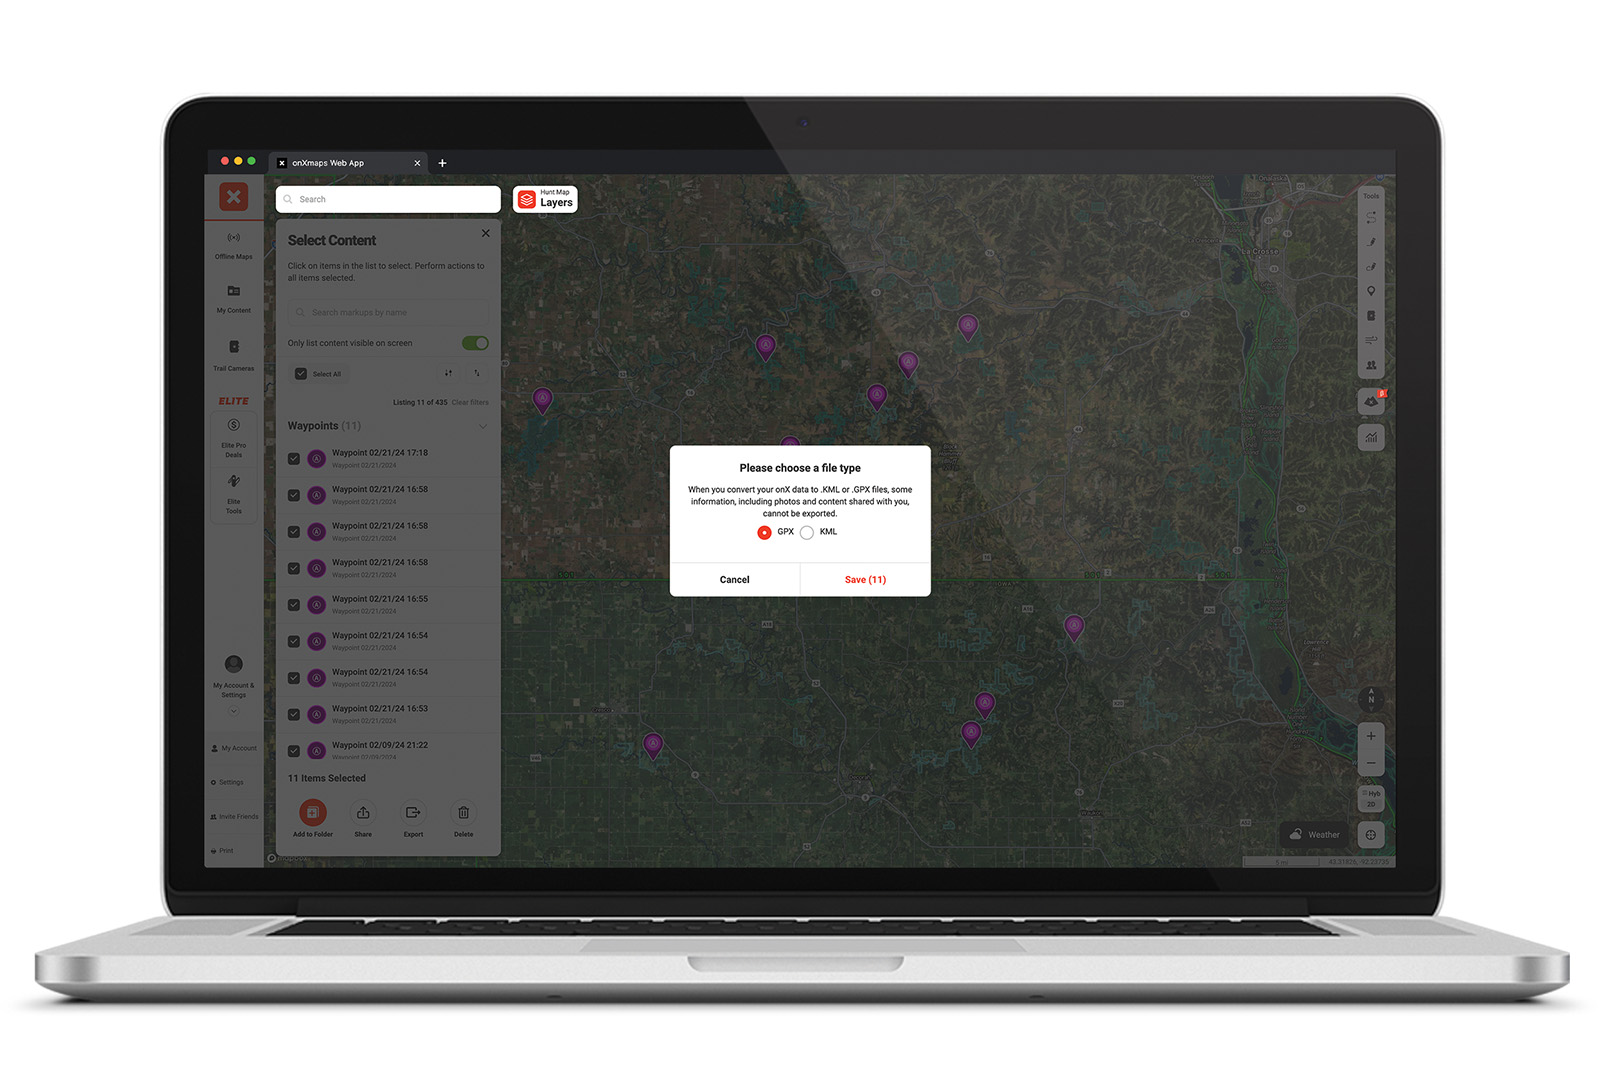
- In the box that appears, choose whether you want to export your data as a GPX or KML file (see the section below for GPX vs. KML considerations).
- Click “Save.”

onX Export Considerations
- Markup customizations such as color, line formatting, and notes are only preserved if you export using the Hunt App and import using the Hunt App. Customizations and notes will not be retained if you use the Web Map to export or import.
- Photos will not be included with your exported file(s), regardless of whether you use the Hunt App or Web Map. If you have critical photos attached to your markups, you may reconsider whether you want to export and then delete those data points as the photos will not be included.
- Currently, you can only export Routes using the Web Map.
- We recommend you export Tracks as GPX files because Tracks exported as KML files will be converted into Lines.
- We recommend you export Lines and Area Shapes as KML files because Lines and Area Shapes exported as GPX files will be converted into Tracks. Exporting KML files is not available in the onX Hunt App, so if you need to export Lines and Areas, please use the onX Hunt Web Map on your computer.
How To Import a GPX File to the Hunt App
Have a GPX file you’d like to view on the Hunt App? Use the import feature. The Hunt App only imports GPX files, so if you’re importing a KML, you’ll need to use the Web Map.
To import data on a mobile device, follow these steps:
- Tap “My Content” from the navigation menu at the bottom of your screen.
- Tap the “Import” button.
- Select the appropriate GPX or KML from your files. Your import will begin automatically.
- When your import is finished, an “Import Complete” box will appear, allowing you to view your imported data by tapping “Show on Map.” You can choose to add your newly imported data to a specific folder by tapping “Add to Folder” and selecting an existing folder or creating a new folder.
How To Import GPX or KML Files Using the Web Map
To import data on a desktop, follow these steps:
- Select “My Content” from the left navigation menu.
- Select the “Import” button.
- Select a GPX or KML file(s) from your computer, or drag and drop the file onto the upload box.
- If you’d like to import the map data to a new folder, check the box at the bottom of the uploader.
- Select “Import.”
- When your import is finished, an “Import Complete” box will appear, allowing you to view your imported data on the map by selecting “Show on Map.”
onX Import Considerations
- The import feature has a 4 MB size limit. If you’re exporting data intending to reimport later, you may want to create several smaller files when exporting your data to make it easier to restore later.