Whether you’ve just joined onX Hunt and you’re ready to make it a trusted tool for finding more whitetails or you need a refresher to make the most of your membership, we’ve got the first four features you should master before your next hunt. They’re all easy, intuitive, and aimed at giving you an edge those without onX don’t have.
Waypoints | Wind Tools | Tracker | Weather
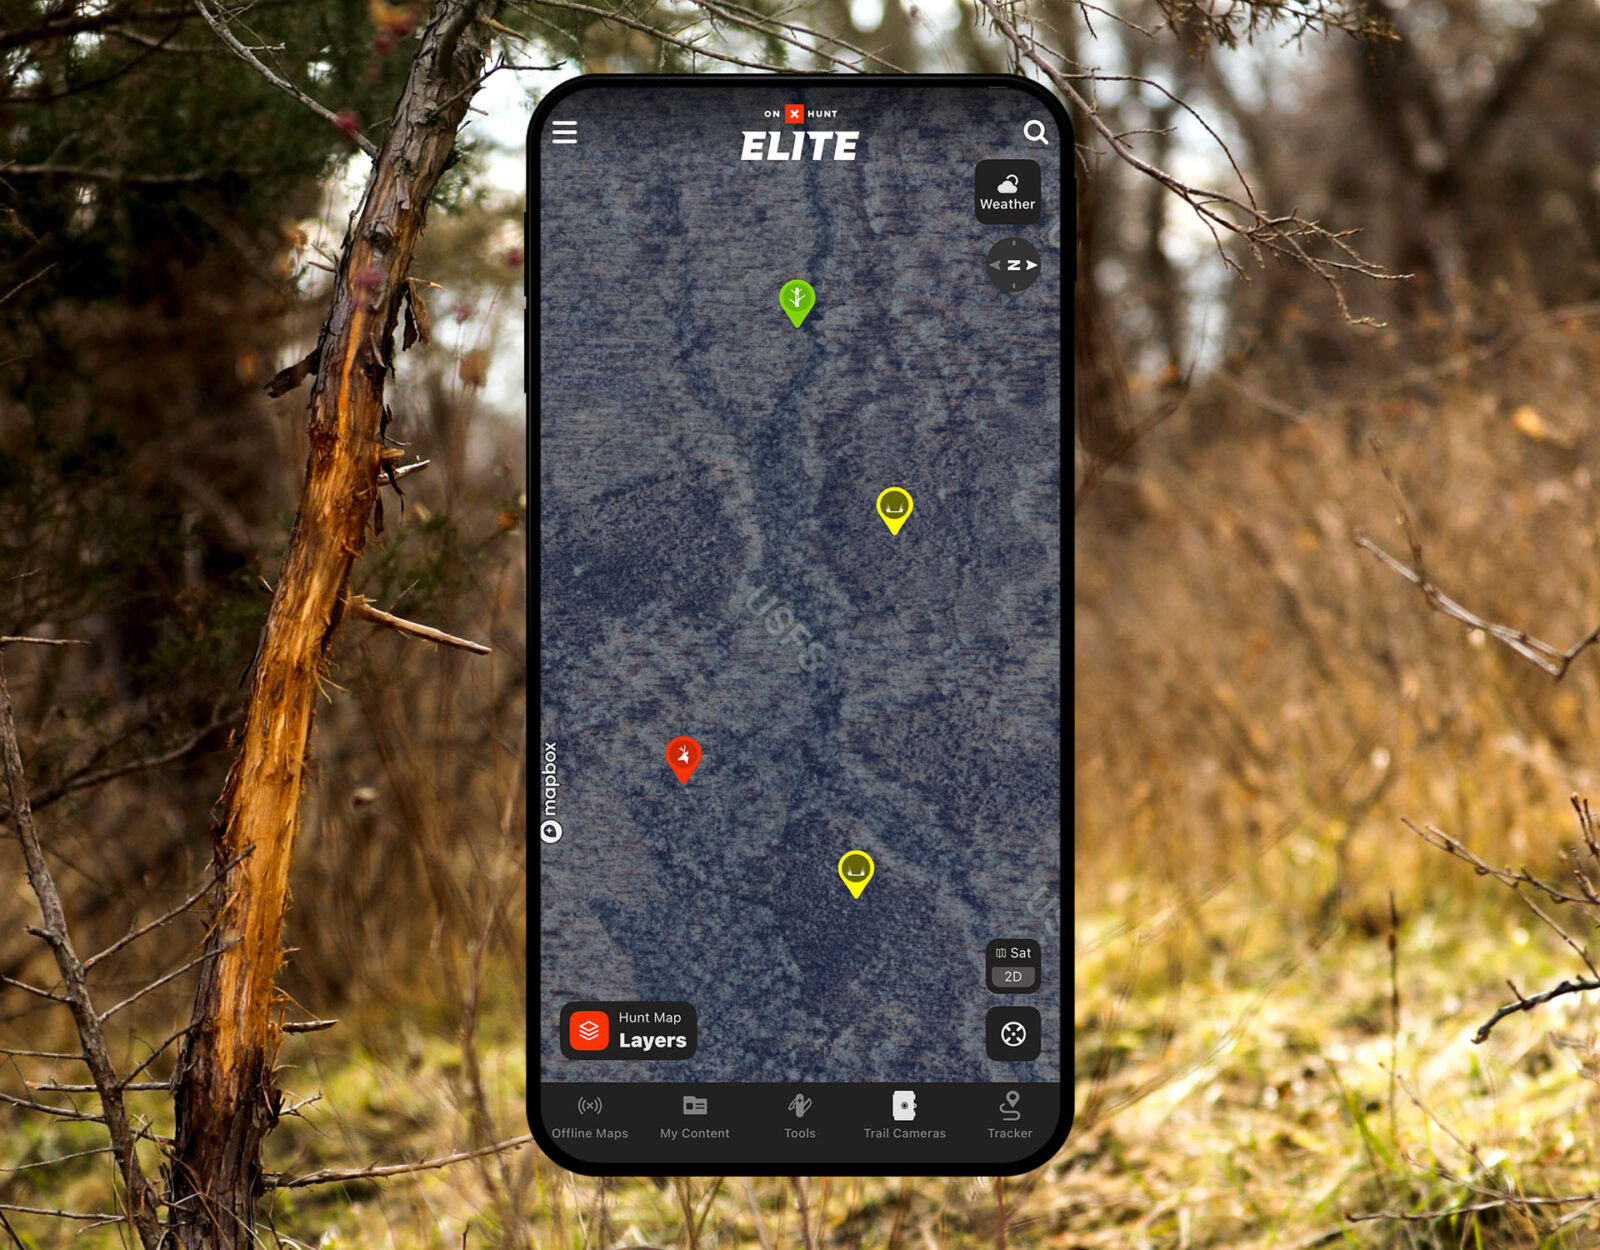
Waypoints
Waypoints are the bread and butter of digital mapping. They are the proverbial “X” that mark the spots. For whitetail hunters, there are some key Waypoints that should appear on every whitetail property. Here’s a list of ones you should never go without:
- Treestand/Blind/Ladder Stand
- Access
- Trail Camera
- Buck
- Scrape/Rub
- Bedding Area
How To Mark Waypoints
onX Hunt has 92 Waypoint icons available for marking your favorite spots. From the ones mentioned above to more nuanced icons denoting stream crossings, pinch points, scat, and “Turn Here” spots, there’s a Waypoint icon for nearly every hunt and every situation.
Marking Waypoints is easy. There are four ways to mark them. If you need to mark the spot at which you are standing you either click Tools and then select the Mark My Location button and your current spot will be saved as an orange “X” Waypoint named “My Location” followed by the date and time.
Another way to save and simultaneously customize a Waypoint is to click Tools and then select the Add Waypoint button. The Waypoint will default on iOS to the last icon you’ve used for a Waypoint and the name will be “Waypoint” followed by the date and time. If you mark a point on Android or onX on Desktop the default icon will be an “X.”
You can also easily add a Waypoint for any location you see on your map, allowing you to mark a spot that you might recognize based on its features or one you want to navigate to. There are two ways to do this. In the App, tap the location you see on the map you want to mark and an “About this location” card will appear on the bottom third of your screen. Select Add Waypoint and you’ll be prompted to customize and save your Waypoint.
Alternatively, you can long-press a spot on the map by holding down on that location for about three seconds and a Waypoint card will appear, again allowing you to customize and save that Waypoint.
Customizing a Waypoint is simple as well. When saving a Waypoint, you will see a few of your other recently used icons, click the plus sign “More” to reveal all 92 icons in alphabetical order. We do provide a search option to save you from scrolling through every icon. Swiping up on the Waypoint card will reveal options to change the color of the “X”, add a Photo to your Waypoint (Premium & Elite Members only), designate a Folder in which to keep track of that Waypoint, or add your own Notes that give the Waypoint more context. You’ll also see options at the bottom of the card to Share or Add Waypoint. Pressing Add Waypoint will allow you to customize the mark to a different color “X,” or icon, or name, just as described above.
Wind Tools
These are the last features in our list of four, and both are only available to Premium or Elite Members. Seeing or setting Wind on Waypoint and our Wind Calendar are incredibly useful for whitetail hunting because knowing which stands or access points to an area won’t blow your cover can mean the difference between a buck down or a buck busted.
Wind Calendar
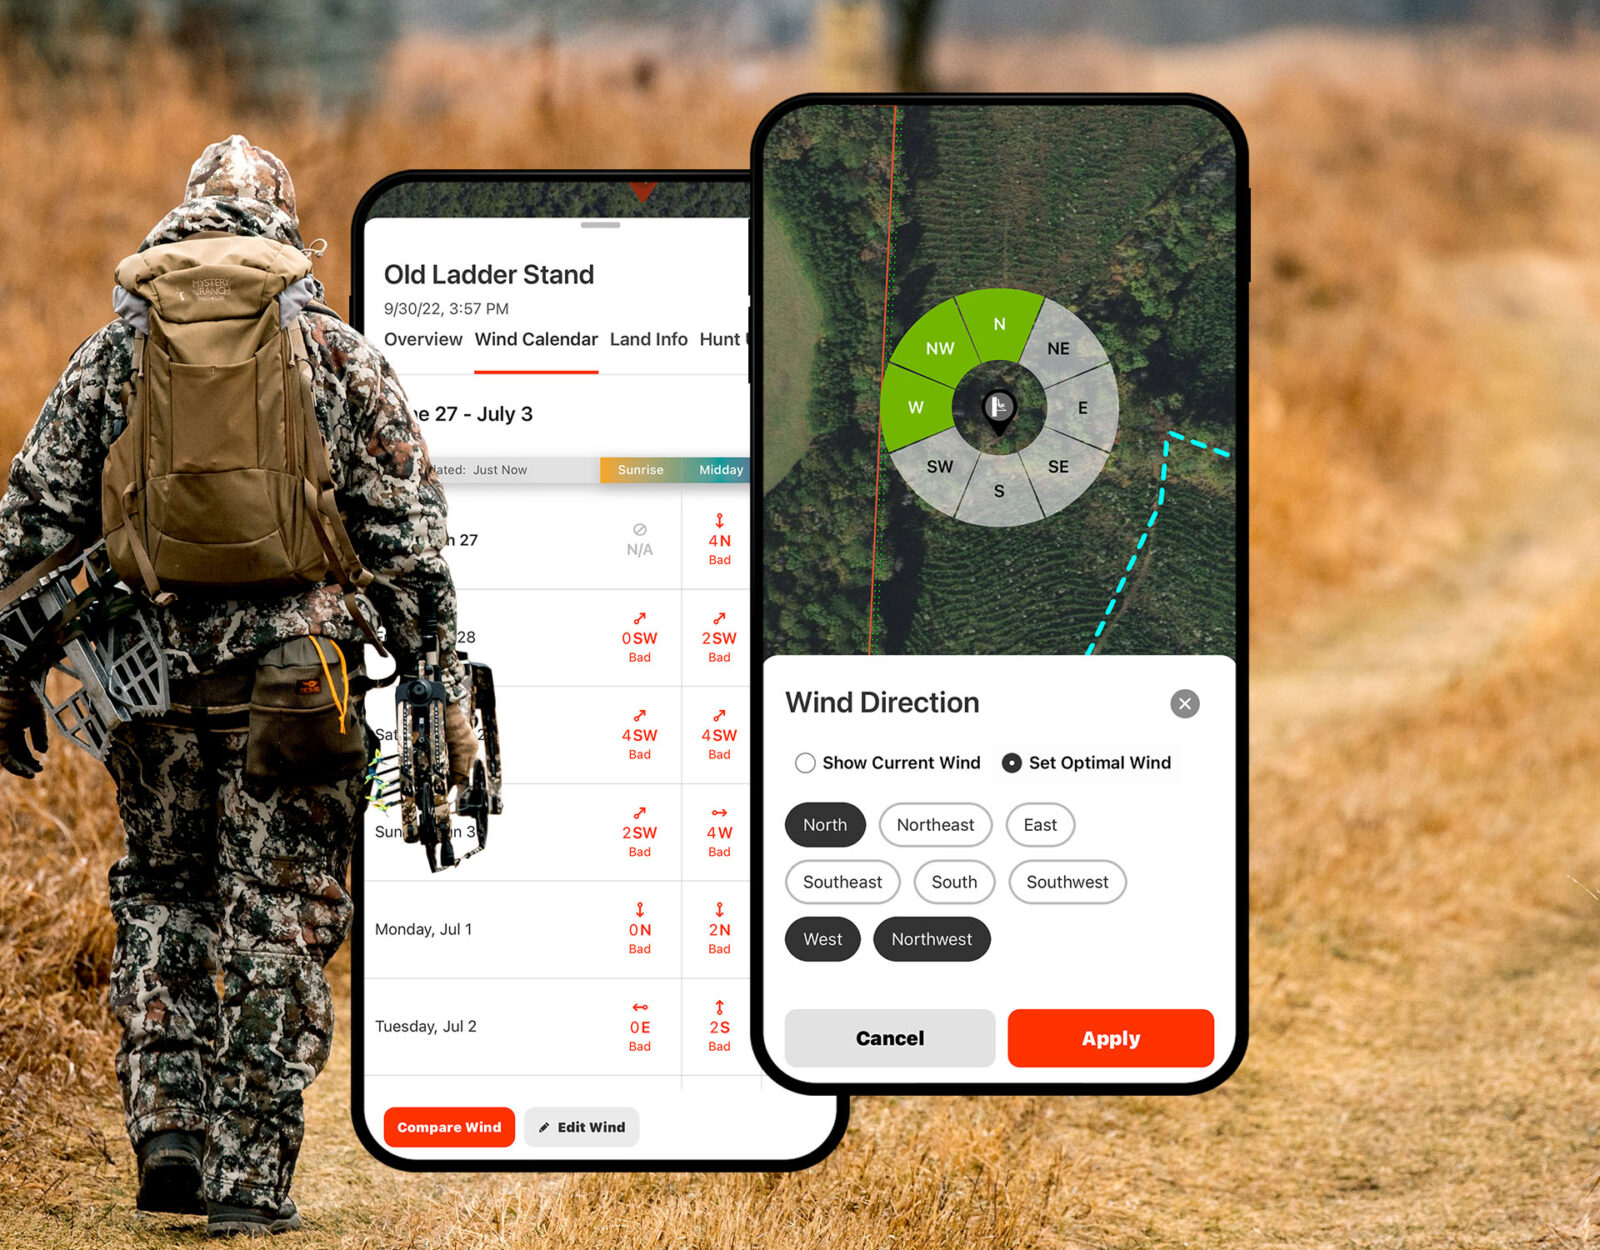
The Wind Calendar is accessible by clicking on an existing Waypoint, or after creating a new one as we’ve covered above. The information card for the Waypoint will show, by default, the Overview of the Waypoint. You can click on Wind Calendar and view daily wind forecasts (direction and speed) for sunrise, midday, and sunset for the next seven days.
Wind on Waypoint
Wind on Waypoint is accessed via the same information card that pops up when you click on a Waypoint. Pull up on the info card to view Waypoint Tools. There you’ll find Wind Direction. Click on that tool and you’ll have the option to Show Current Wind or Set Optimal Wind.
Show Current Wind
Show Current Wind is exactly what it sounds like. You’ll see current wind speed and direction for that saved Waypoint.
Set Optimal Wind
Set Optimal Wind allows you to choose the best wind directions for that Waypoint, which is very useful if you know how deer are accessing that location. Select the Set Optimal Wind button and you’ll be presented with eight directional sections around the Waypoint. You can choose up to seven of those eight for “Optimal Wind.” Then when you view that Waypoint on the map you’ll see at a glance whether the wind is optimal, ok, or bad based on the color of the wind conditions above the Waypoint. For a better visual, you can click the wind conditions above the Waypoint and see a directional compass as it relates to wind direction.
Now, with Optimal Wind set for your Waypoint, you can pull up the Wind Calendar and view a very detailed, color-coded display of projected wind conditions over the course of the next seven days. You might see that sunrise in three days meets your criteria for good wind, but an evening sit on the same day will blow your scent in the wrong direction.
For even more power, you can compare Optimal Wind for multiple Waypoints at once, which is perfect for those who have different stands or blinds in the same general area. You can choose the best time of day to sit in the best spot based on wind direction. It’s truly a game changer.

Tracker
Now it’s time to connect the dots between Waypoints with Tracker. The Tracker allows you to record your path and save it as a Track so you can find your way back or show others where you’ve been and how you got there. Tracks can be added to Folders or even Trimmed if you forget to turn it off after your hunt is over.
When viewing a map on the App, tap the Tracker button in the bottom right corner to open the Tracker menu. When you’re ready to start your hike, click the green Start button. Your track will begin to appear as you move, leaving a blue “breadcrumb” trail. The Tracker menu will show your time traveled, distance traveled, and current speed.
You can Pause to temporarily stop recording or hit Stop to finish recording your Track. The default Track name is similar to Waypoints where it will be named “Track” followed by the date and time. When you are ready to save the Track you’ll also see your elevation gained/lost and a section for you to add Notes for context related to that Track.
Weather
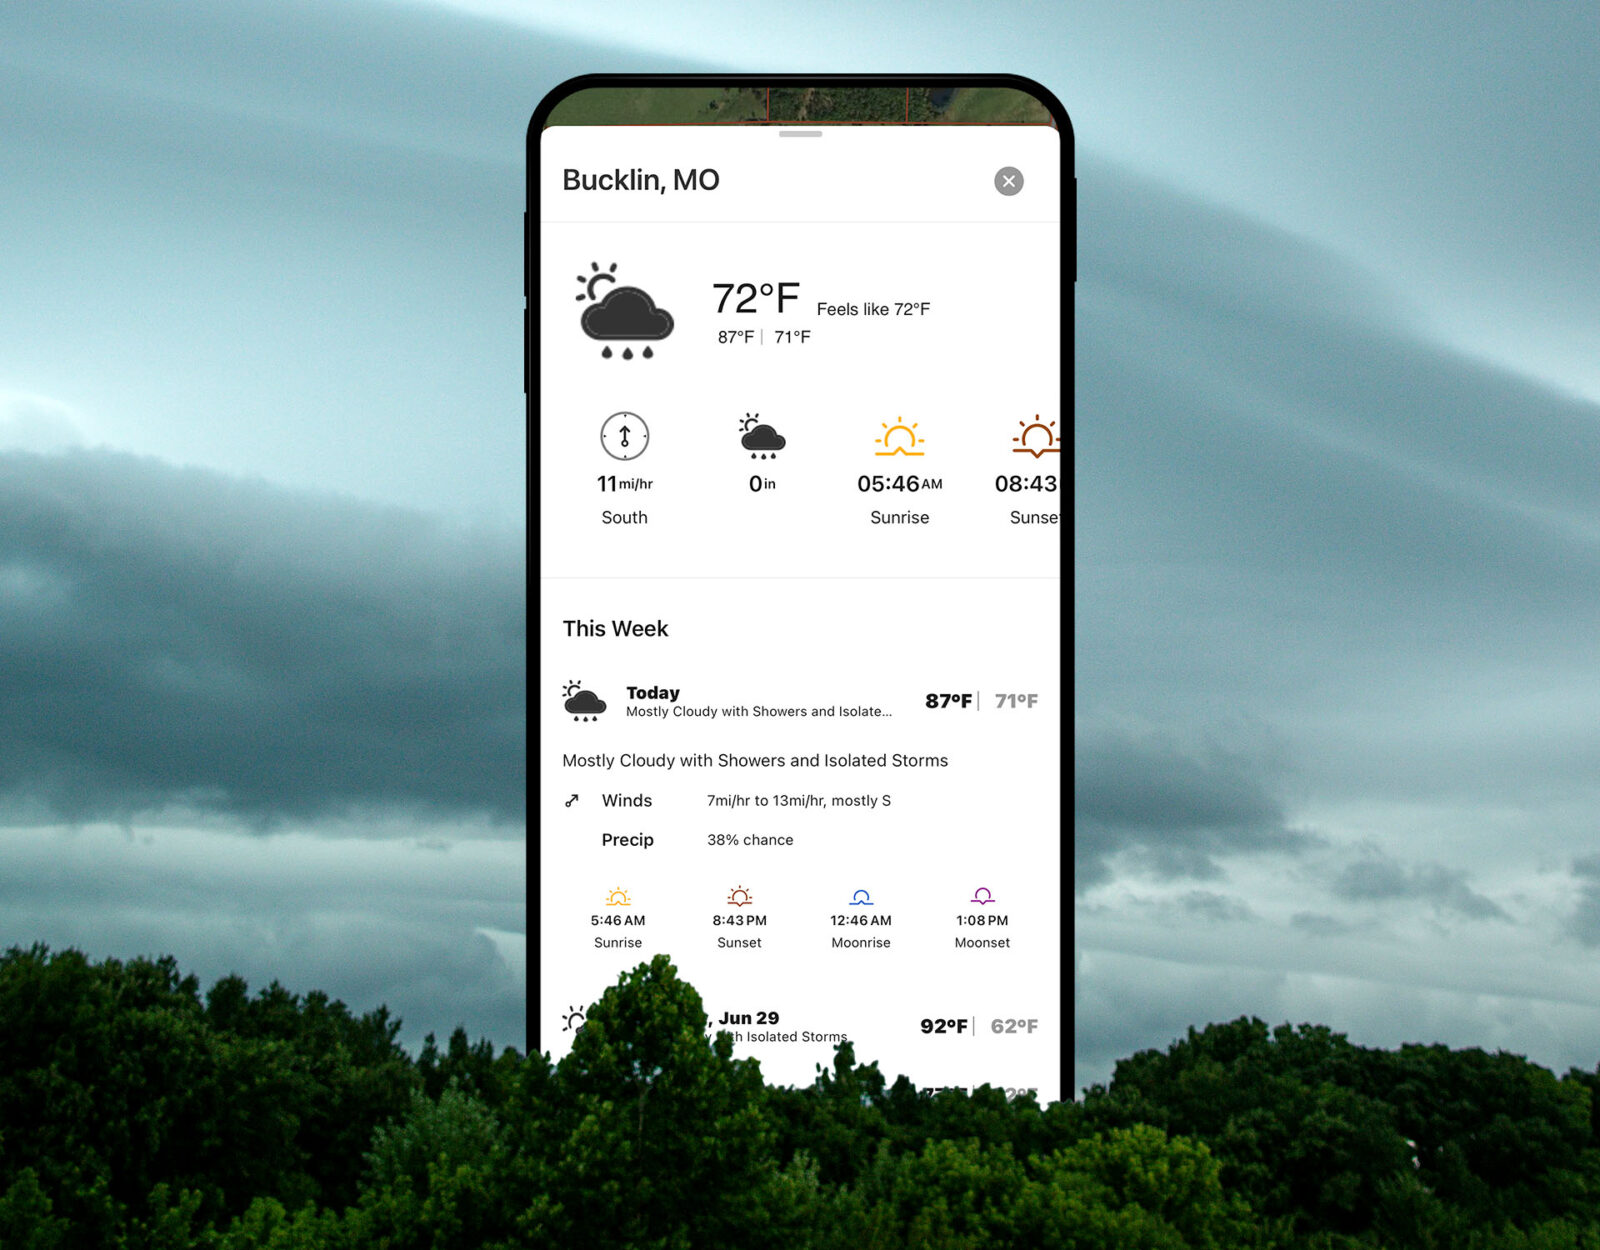
You might not be able to control the weather outside, but when it comes to mastering weather in the Hunt App it’s a snap. Click the Weather icon in the upper-right corner and quickly view the temperature, wind speed, precipitation, barometric pressure, and sunrise. Pull up on the card and there’s so much more: moon phases, weekly and hour-by-hour forecasts 16 days out.
Forget pulling up a forecast on another app that’s showing generic information based on a zip code. Wherever you want weather information for on the map we’ll pull from the nearest of 100,000 weather stations and provide updates to conditions every 15 minutes.
To show weather information from your current location, make sure the blue dot is showing on the map and shows your current location. If it doesn’t, tap the Current Location button that looks like a partial “X” inside a circle. That will bring the map view to your current location. Then press the Weather button in the upper right corner of the map. You’ll see detailed current weather information, along with forecasts up to 16 days out.
If you want to see current and forecasted weather for any other location, just point to a spot on the map and the “About this location” card will pop up. Click “Weather” and all the relevant weather information, sourced from the nearest weather station to that location, will appear.
Weather information is reliant on having wi-fi or cellular service, so if you are in Offline Mode weather will not be available.